Shelf read
Constructing a Miniature Felt Home: A Comprehensive Guide for Beginners
Since being inspired by the whimsical charm of fantasy literature, I have developed a deep appreciation for unique and quirky architectural designs. One of the best ways to bring these visions to life is through the medium of felt.
Kenneth Lopez
Library note
Reading tip
The full chapter continues below on the soft reading shelf.
Stack
Pocket Library
Since being inspired by the whimsical charm of fantasy literature, I have developed a deep appreciation for unique and quirky architectural designs. One of the best ways to bring these visions to life is through the medium of felt.
This guide provides a straightforward introduction to crafting your own plush felt house. Even if you are entirely new to sewing, this project is highly accessible as it can be completed using just a single, basic stitch. Follow this detailed walkthrough to build your first soft sculpture and gain the skills to create an entire village of custom homes.
Necessary Supplies and Equipment
Before you begin, gather the following materials:
-
Small scraps of felt in various colors.
-
Embroidery floss or standard sewing thread.
-
Sewing needles, pins, and sharp scissors.
-
Polyester fiberfill for stuffing.
-
Small remnants of patterned fabric (optional).
-
Decorative elements such as buttons, beads, or ribbons.
-
A marking tool, such as a water-soluble fabric pen.

Step 1: Drafting the House Outline
The initial phase involves creating a cardboard template. For a classic, beginner-friendly design, sketch a square or rectangle topped with a triangle to form a pointed roof. This five-sided shape is much easier to manage than designs with complex curves.
Decide on the scale of your project; working small can be intricate, while a larger house requires more time-consuming stitching. Once your template is ready, trace the shape onto your primary felt color twice and cut them out. These will serve as the front and back of your home. Using a specialized fabric marker is ideal here, as the marks can be removed with a damp cloth, unlike permanent pens which leave unsightly lines.
Step 2: Decorating the Facade
Select one of the felt pieces to be the front of the house. To add a roof, use your cardboard template to cut a triangular piece from a different colored felt or patterned fabric. Pin this in place at the top of the house.
If you choose patterned fabric, be aware that it may fray; using felt is often simpler for beginners as the edges remain clean. Secure the roof by sewing along only the bottom edge using a running stitch. Leave the top two sides of the triangle unsewn for now, as they will be joined when you assemble the entire structure later.
Step 3: Positioning the Entrance
With the roof secured, it is time to add a door. Choose a felt color that complements your roof—for example, if your roof has blue details, a blue door works beautifully. Cut a small rectangle or a rounded arch for the door and decide on its placement.
Centering the door is traditional, but placing it to the side allows more room for other decorations. Secure it to the front panel with small stitches. If your stitching is still developing, use thread that matches the felt to hide any irregularities; if you are confident, a contrasting color can add a decorative touch.
Step 4: Adding Windows and Hardware
A house feels more complete with a few extra details. For a doorknob, a small button or bead is perfect. You can also add windows by cutting small circles or squares from felt and sewing them onto the facade. Consider the balance of your design—if your door is off-center, a window on the opposite side can provide visual harmony.
Step 5: Embellishing with Floral Details
To prevent the exterior walls from looking too plain, consider adding a stitched "wall flower." This adds a layer of whimsy to the plushie. You can sew a simple green line to act as a stem and top it with a flower-shaped button or a French knot. Feel free to incorporate your own personality here, perhaps adding a crawling vine or a tiny beaded garden.
Step 6: Joining the Panels
Once the front is fully decorated, place it on top of the plain back piece, aligning the edges as closely as possible. Pin them together to prevent shifting. Start sewing from one bottom corner, moving up the side, around the roof, and down the other side.
Leave the bottom edge open for now. While more advanced crafters might use a blanket stitch, a simple running stitch or a sturdy backstitch is perfectly suitable for beginners. Aim for consistent spacing from the edge of the fabric to ensure a neat appearance.
Step 7: Adding Volume with Stuffing
Through the open bottom edge, begin inserting small tufts of polyester fiberfill. It is crucial to use small pieces and push them firmly into the highest points of the roof first.
Beginners often make the mistake of under-stuffing, which results in a limp, wrinkled appearance. Use a blunt tool, like a pencil or a stylus, to ensure the filling reaches into the corners. The house should feel firm and hold its shape without putting excessive strain on your stitches.
Step 8: Finalizing the Plushie
After the house is sufficiently filled, sew the bottom edge closed to secure the stuffing. This completes the basic structure.

This decorative item can be adapted for various uses. You can attach a ribbon loop to the top to turn it into a hanging ornament, or fill it with a scented sachet to create a fragrant drawer insert. As you gain experience with different stitches and patterns, you can experiment with more complex architectural designs and functional features.
COVER · en

Chinese Folk Clay Art Guide
Chinese folk clay sculpture—often referred to as clay figurine art—is a handcrafted sculptural tradition grounded in everyday experience. Created from natural clay through shaping by hand, carving, and gradual drying, and sometimes strengthened through high-temperature firing, these works preserve impressions of daily life, local traditions, and collective memory.
COVER · en

Canton Tower is Now the Tallest Tower in China
We have already discussed the Oriental Pearl Tower, which remained China’s tallest tower until 2007. So which structure took its place? That distinction went to the Canton Tower.
COVER · en
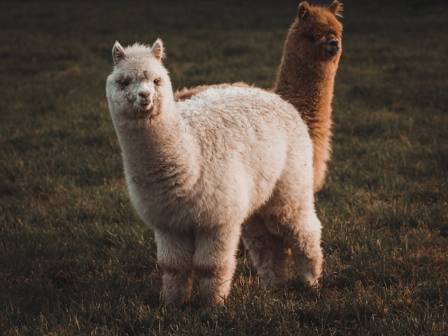
The Most Delightful Facts About Alpacas
Alpacas are often celebrated for their soft fleece and gentle demeanor, but there’s more to these camelids than meets the eye. This piece revisits five intriguing aspects of alpacas—from ancient origins to fiber properties and therapeutic uses—delivering a concise, engaging look at why these animals captivate people worldwide.
COVER · en

The Downsides of Consuming Soft Drinks
Soft drinks are a staple in many diets, especially in the United States, where annual consumption exceeds 13 billion gallons. These beverages often include ingredients like carbonated water, sweeteners (such as sugar or high-fructose corn syrup), various acids, sodium, and a significant amount of calories. While they may be popular for their taste and convenience, soft drinks come with a host of health drawbacks—particularly when consumed regularly in place of more beneficial fluids like water or herbal teas.
COVER · en

10 Charming Sitting Poses That Elevate Your Photos
When it comes to portraits, how you sit can completely transform the vibe of your picture. Whether snapping casual shots with friends or working with a professional photographer, knowing a few versatile poses helps you look natural, stylish, and confident. From relaxed angles to playful twists, these sitting ideas will bring variety and creativity to your photo collection.
COVER · en

Create a Cozy and Inviting Living Room
The living room is often the central gathering place in a home—a room for relaxing after a busy day, spending time with family, welcoming guests, or simply enjoying some quiet time. Designing this space to feel comfortable and inviting can make the entire home feel warmer and more pleasant.